Are you looking for a unique and flavorful addition to your indoor garden? Look no further than wine cap mushrooms! These robust and meaty fungi are perfect for indoor cultivation, and with our step-by-step guide, you’ll be able to enjoy a continuous crop of homegrown mushrooms. Whether you’re a seasoned grower or a novice to indoor gardening, we’ll provide you with all the essential tips and tricks to successfully grow wine cap mushrooms indoors.
In this section, we’ll explore the basics of growing wine cap mushrooms indoors, including how to create the ideal environment for your fungi to thrive. Follow our guide and get ready to enjoy the delicious, earthy flavour of homegrown wine cap mushrooms in your favourite recipes. Read on to learn how to grow wine cap mushrooms indoors!
Selecting the Right Variety of Wine Cap Mushrooms
When choosing which variety of wine cap mushrooms to cultivate indoors, it’s important to consider their specific growing requirements. Varieties like Stropharia rugosoannulata (also known as King Stropharia) thrive in wood chips, while Stropharia aeruginosa (also known as the Verdigris Agaric) prefer more compost-based substrates.
It’s also essential to select high-quality mushroom spawn to ensure a successful harvest. Look for reputable suppliers that offer fresh, viable spawn from a variety of wine cap mushroom strains. Some popular options include Fungi Ally, Field and Forest Products, and Mushroom Mountain.
Before purchasing spawn, be sure to research the specific requirements of your chosen variety to ensure that you provide the appropriate growing conditions and substrate mix.
Preparing the Growing Substrate
When it comes to growing wine cap mushrooms, preparing the right substrate is key to achieving a healthy and fruitful harvest. In order to create the perfect mixture, you’ll need to select the right ingredients and pay attention to the ratios.
The ideal substrate for wine cap mushrooms is a mixture of straw and hardwood chips. Make sure the straw is finely chopped, and the hardwood chips are small enough to promote colonization by the mushroom spawn. A ratio of 2:1 is usually recommended for the straw to hardwood chips.
Before mixing the ingredients, it’s crucial to pasteurize them to eliminate any potential pathogens or contaminants. You can pasteurize the substrate by soaking it in water overnight and then bringing it to a temperature of 160°F for 1 hour. Once the substrate is cooled and drained, it’s ready to mix with mushroom spawn.
The final mixture should be moist and dense enough to hold its shape when squeezed without releasing too much water. An optimal substrate consistency will promote strong root growth and prevent contamination.
Creating the Ideal Environment
To ensure a successful harvest of wine cap mushrooms grown indoors, it is crucial to create the ideal environment that mimics the conditions of their natural habitat. Maintaining the right temperature, humidity level, and air exchange is essential for optimal growth and health of the mushrooms.
The ideal temperature for wine cap mushrooms to grow is between 60-80°F (15.5-26.5°C). This temperature range promotes mycelium growth and mushroom formation. Make sure to keep the temperature consistent throughout the growing process, as fluctuations can harm the fungi.
Humidity levels of 70-90% are ideal for wine cap mushrooms. Maintaining the right humidity promotes the formation of fruiting bodies and can prevent the growth of harmful bacteria and fungi. To keep the humidity at the proper level, mist the substrate with water daily or use a humidifier to maintain humidity levels.
Air exchange is also crucial for successful mushroom cultivation. Wine cap mushrooms require fresh air to circulate and to prevent the buildup of harmful gases such as carbon dioxide. Allow for proper ventilation in your growing area by opening windows, using fans, or installing an air filtration system.
Managing the temperature, humidity, and air exchange may require some experimentation and adjustments to achieve the ideal environment for your wine cap mushrooms. Pay close attention to the conditions of their growth and adjust accordingly to maximize your harvest.
Planting Wine Cap Mushroom Spawn
Once you have prepared your growing substrate, it’s time to plant the wine cap mushroom spawn. Here’s a step-by-step guide:
Step 1: Distribute the Spawn
Break the spawn into small pieces and distribute it evenly across the surface of the substrate. Be sure to wear gloves to minimize the risk of contamination.
Step 2: Mix the Spawn and Substrate
Using a sterilized utensil, gently mix the spawn and substrate. This will help evenly distribute the spawn throughout the substrate and encourage proper colonization.
Step 3: Cover and Wait
Cover the substrate with fresh soil and place a plastic bag over the container to maintain humidity. Place the container in a warm, dark place and wait for the mycelium to start growing. This process typically takes around 1-2 weeks.
Step 4: Begin Air Exchange
Once you see the mycelium growth, it’s time to introduce air exchange to encourage the growth of fruiting bodies. Remove the plastic bag and place the container in a well-ventilated area, maintaining a temperature between 65-75°F and humidity levels around 70-90%.
Follow these steps carefully to ensure optimal colonization and mycelium growth, leading to a successful harvest of wine cap mushrooms.
Troubleshooting Common Issues
Despite your best efforts, you may encounter obstacles while growing wine cap mushrooms indoors. One common issue is contamination, which can be caused by improper sterilization or a contaminated growing substrate. To prevent this, ensure that all equipment and materials are properly sterilized and use a high-quality spawn source. If you notice mould growth, discard the affected substrate and start over.
Another issue you may encounter is slow growth or lack of fruiting. This can be caused by factors such as improper temperature or humidity levels, inadequate air exchange, or a low-quality spawn source. Evaluate your growing conditions and adjust as needed. Additionally, check your mushroom spawn source and ensure it is from a reputable supplier.
Pests such as mites and flies can also be a problem for indoor mushroom cultivation. To prevent pest infestations, keep your growing area clean and free of debris. Consider using sticky traps or natural pest deterrents like neem oil.
Expanding Your Mushroom Cultivation
Congratulations on successfully cultivating wine cap mushrooms indoors! Now that you’ve mastered the basics, it’s time to explore new possibilities and broaden your mushroom cultivation endeavours.
Experiment with Other Mushroom Varieties
If you’re looking to expand your fungal horizons, consider experimenting with other types of mushrooms. There are many popular edible varieties, including shiitake, oyster, and portobello, that are perfect for indoor cultivation. Do your research to understand the specific growing conditions required for each variety before starting your new project.
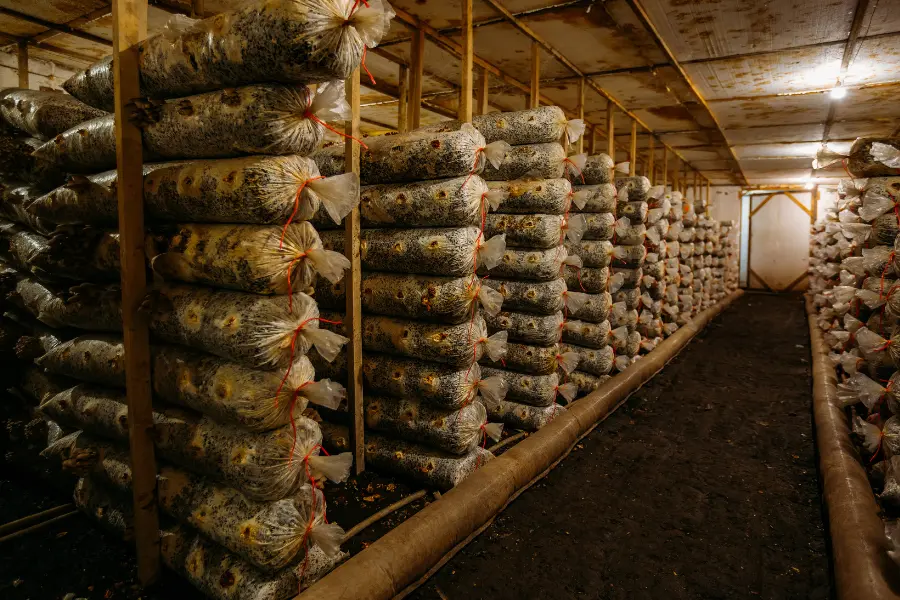
Scale Up Your Mushroom Production
If you’re interested in growing mushrooms on a larger scale, you may want to consider investing in equipment and materials to increase your yield. This could include items such as commercial-grade grow bags, automated humidity and temperature controls, and specialized lighting systems.
Explore Advanced Mushroom Cultivation Techniques
There are many advanced cultivation techniques that can help you take your mushroom-growing skills to the next level. For example, you may consider trying your hand at cloning or tissue culture, which are advanced methods of propagating mushroom cultures. Other technical aspects include agar media preparation and petri dish infection. As a bonus, these skills will come in handy when you come across wild mushrooms in nature.
By expanding your mushroom cultivation, you can discover new and exciting ways to enjoy these delicious and nutritious fungi all year round.